Navigation: Setting up >
Set up a virtual machine of ProxyNow!
You need to have a virtual image file
The files will be something like (refer image below), which you will get when you purchase ProxyNow! as a virtual machine.
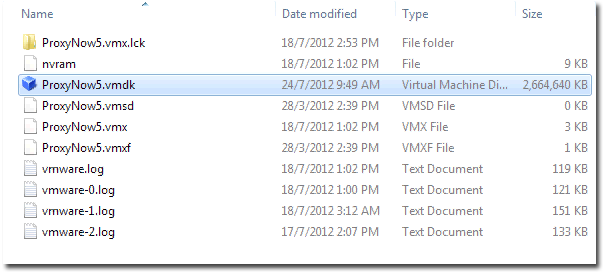
The main file is ProxyNow5.vmdk
It is the virtual hard disk file that contains the actual software and it will run on VirtualBox as well as VMware, whereas Virtual PC requires a different format which can be obtained from InternetNow!.
Make sure your hardware is sufficient
Before you install ProxyNow! 5, you need to make sure your hardware is sufficient.
1. Have a relatively fast CPU. Reasonably powerful x86 hardware. Any recent Intel or AMD processor should do.
2. Recommended at least 15GB free space on your hard disk. The image for PN5 is around 3GB and extra spaces is needed for your cache as well as your log files.
3. Have sufficient RAM on the host machine. Recommended at least 1GB free that is exclusive for ProxyNow! alone. For example if you are using Windows XP, it requires at least 1GB of RAM to run smoothly. Plus another 1GB needed by ProxyNow!, that will be a total of 2GB required.
4. Software that you need to run on is Oracle VirtualBox. We recommend VirtualBox because it is open source and available for free. You can use VMware: VMware player, VMware workstation, VMware server or VSphere. Other than that, you can also use Microsoft Virtual PC but you need a special version of the virtual machine hard disk, which you can obtain from InternetNow.
How to configure ProxyNow! 5 image file
We will show you how we configure the image file by using VirtualBox. For VMware user, please refer to your VMware manual accordingly.
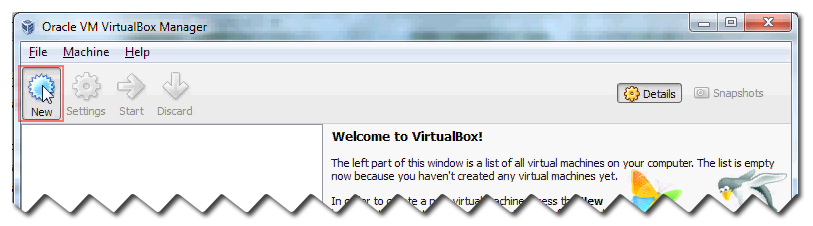
Run virtual machine wizard.
Click on New | Continue
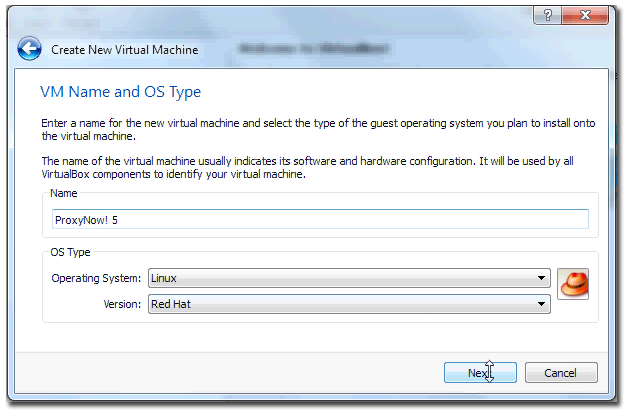
Give a Name to your machine, let say we use ProxyNow! 5.
Then choose the Operating System. ProxyNow! uses Linux (more specifically, it is actually CentOS 6). For Version, if you don’t have CentOS in the list, just choose Red Hat. Must make sure it’s not the 64 bit version. This is because ProxyNow! runs on 32 bit.
Once done, click Next .
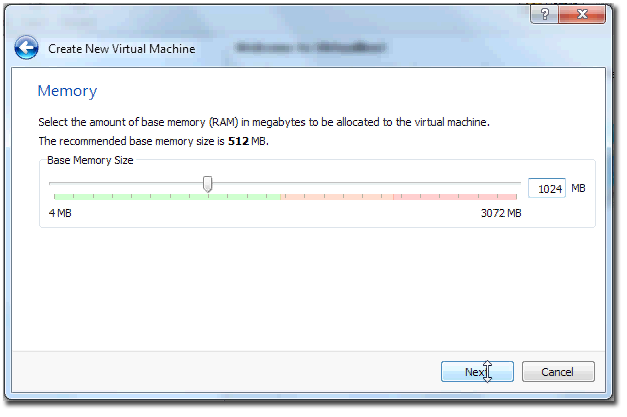
Now, set the base memory / RAM that need to be allocate for the virtual machine.
The recommended RAM is actually 1GB or you can put 1024MB.
Once done, click Next.
Here, select the Use existing hard disk and choose your hard disk. Locate the .vmdk file we saw earlier. Select it and click Open.
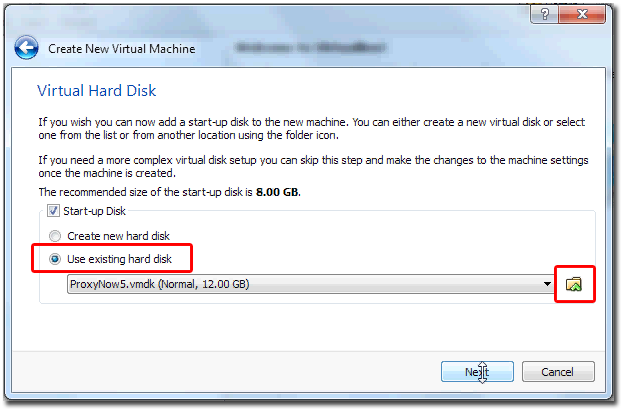
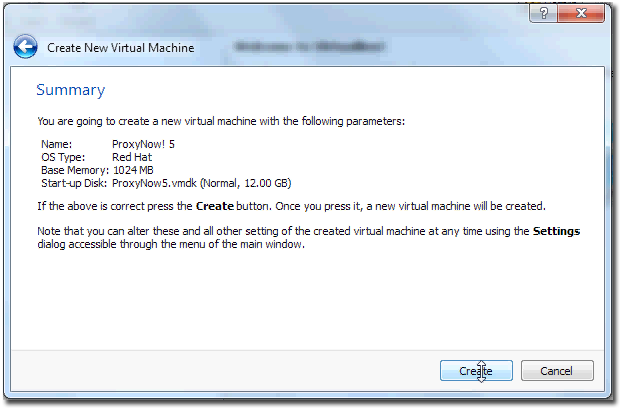
Now, click Next | Create
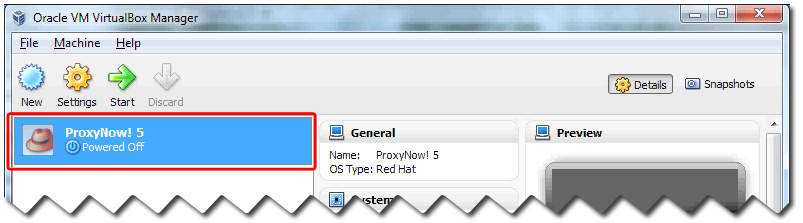
Once you have created the virtual machine, you should be able to see the virtual machine as:
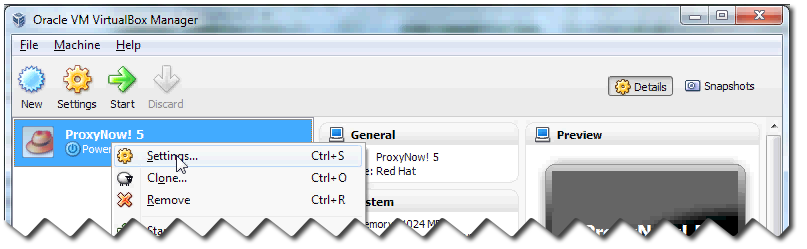
Before you run it, you need to ensure that the network is properly configured.
Right click on your virtual machine and select Settings
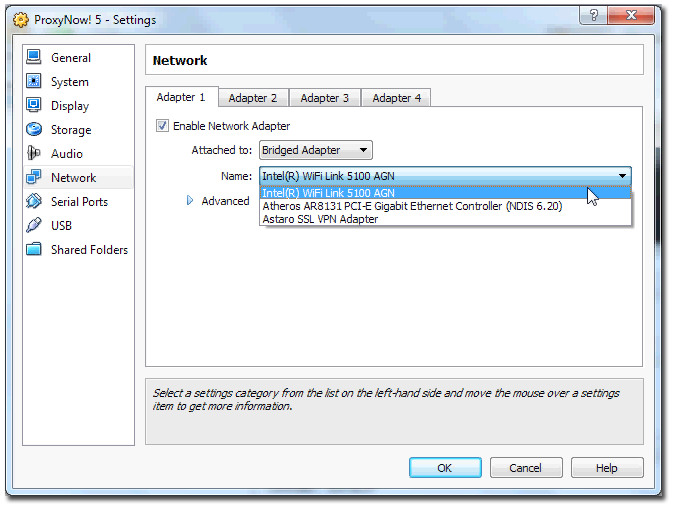
Under Network, you need to ensure that at least one network card(adapter) is enabled.
On the Attached to, set the option to Bridged Adapter.
On the Name, the drop down menu shows at least 3 different adaptors are detected in this particular example, so you must choose the right one.
Don't not change anything under on Advanced, this is the virtual adapter on the Linux image.
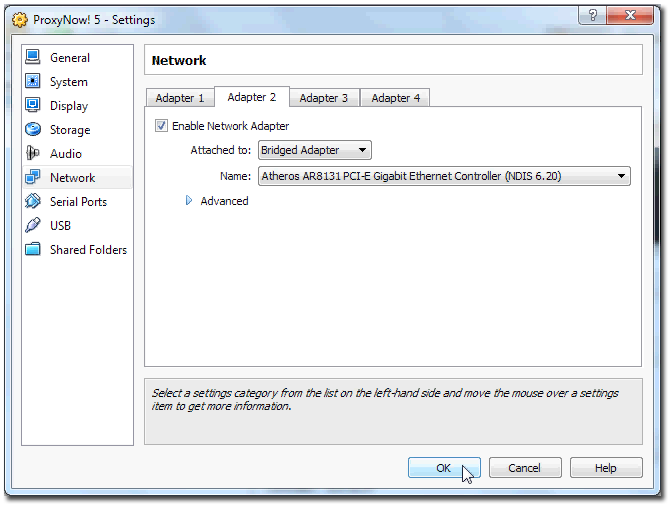
If you intended to use 2 network cards, then you have to enable Adapter 2.
Like before, on the Attached to, set the option to Bridged Adapter and choose your second network card.
Once done, click OK.
So, that’s all that we need to configure and now we are ready to run the machine.
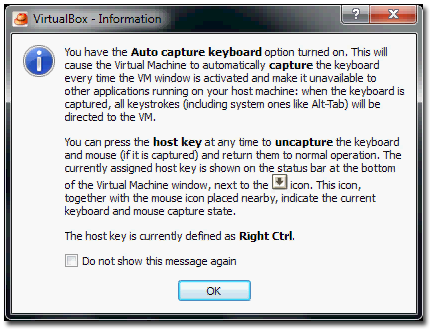
Right click on the virtual machine and select Start
.png)
If you see this pop-up, it is just a reminder saying that once you start running the virtual machine, in order for you to escape from the virtual machine, you must press on the right Ctrl button. If not you won’t be able to come out of the virtual machine.
000709.png
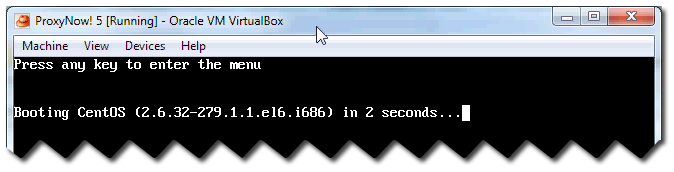
The starting on ProxyNow! will take some time. So, just let it load.
You can press F10 to see what is happening in the background.
000715.png
Once the login prompt appears, that mean we are ready to login. You may still see some additional messages appearing, these are basically ProxyNow!’s own loading code. While loading different module that belong to the ProxyNow! 5, the operating system itself is already ready to run.
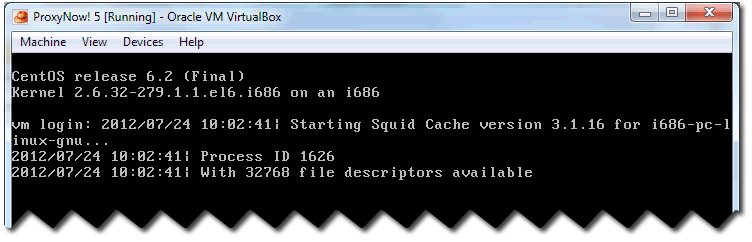
000840.png
To see the login screen, press Enter for few times and we now can login using the root account.
The default password is tomtom
For security purposes, it is highly recommended that you change the password later on.
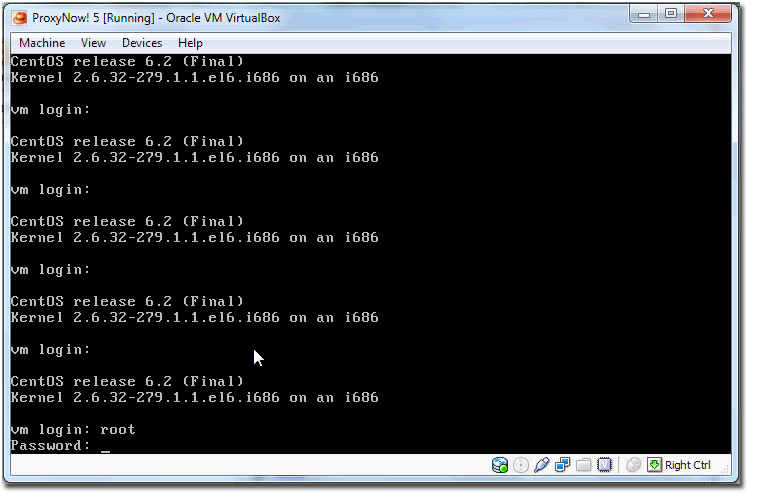
000913.png
Once logged in, run the command ifconfig to see what are the interfaces that we have up and running.
In the example below, we only have the lo interface, which is the local interface. While the two network interfaces I selected just now are not shown here.
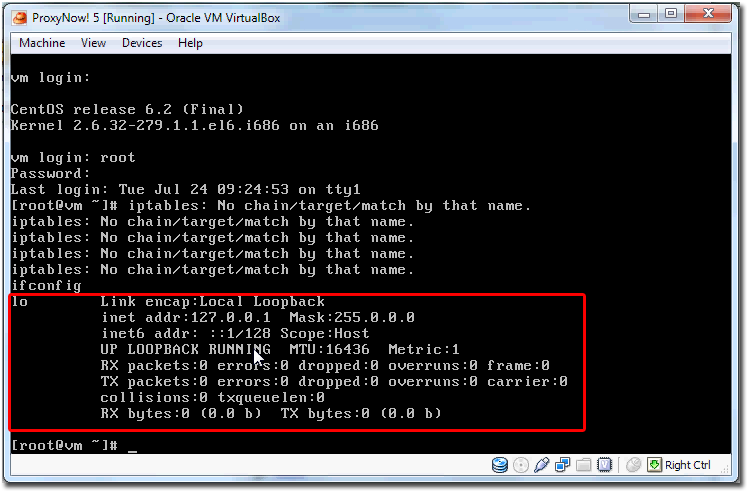
000934.png
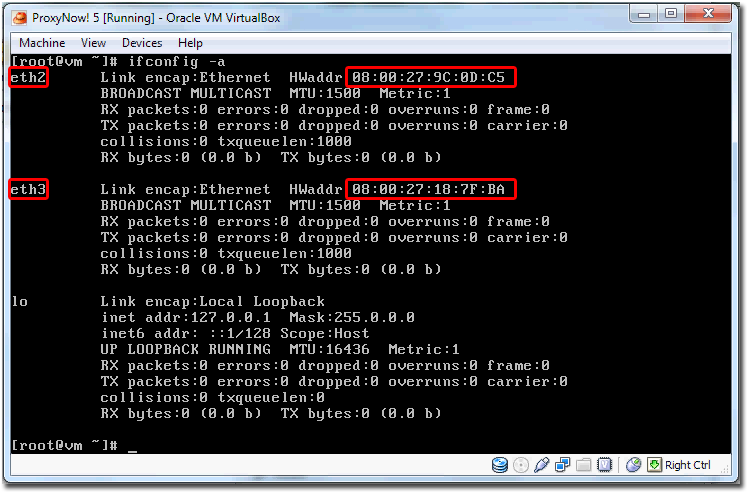
To ensure that the two networks adapters are in the system, use command ifconfig -a to see all the list of adapters.
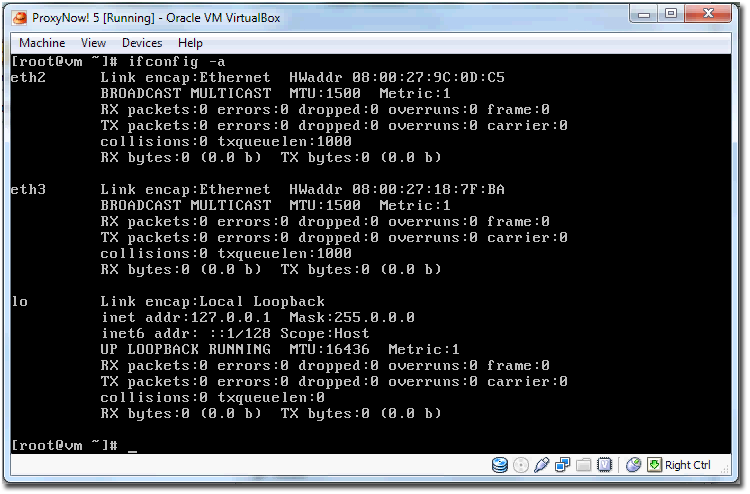
001013.png
From the list, we already have eth2 and eth3. So the two network interfaces that we configured on the setting just now are in fact there but they are not loaded.
In some machines they might be loaded up correctly, but you have to be aware that sometime they are not loaded correctly.
So in this case, we need to load up the adapters. Since we have two adapters here, we need to ensure that we are looking at the right one and never assume that the eth2 maps to the 1st adaptor, or eth3 maps to the 2nd adaptor.
To check this, go back to your virtual machine’s setting.
Right click on it and select Setting | Network
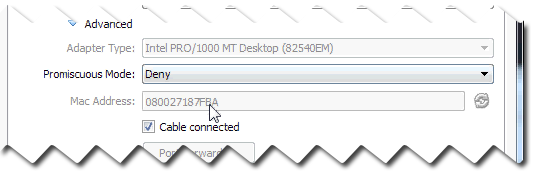
As you can see, adapter 1 has a virtual Mac Address which is 0800279C0DC5

001126a.png
and virtual Mac Address for adaptor 2 is 080027187FBA.
001126b.png
Now, go back to this window and check for the HWaddr (hardware address)
The eth2 shows 0800279C0DC5 and eth3 shows 080027187FBA, both are correct. So, we can confirm that the eth2 maps with adapter 1 and eth3 maps with adapter 2.
001013b.png
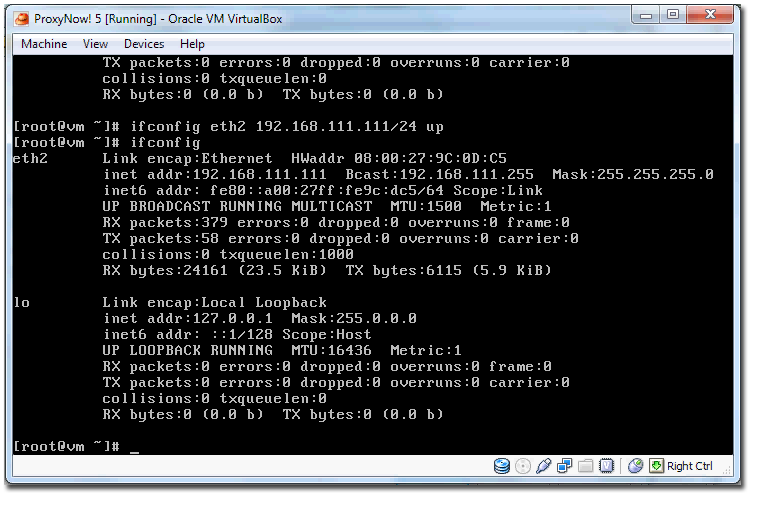
Now we need to load up the interface.
Run the command ifconfig eth2 {your ip}/{subnet} up

001229.png
Now, run ifconfig again and if we can see eth 2, then this means the interface is actually up.
001242.png
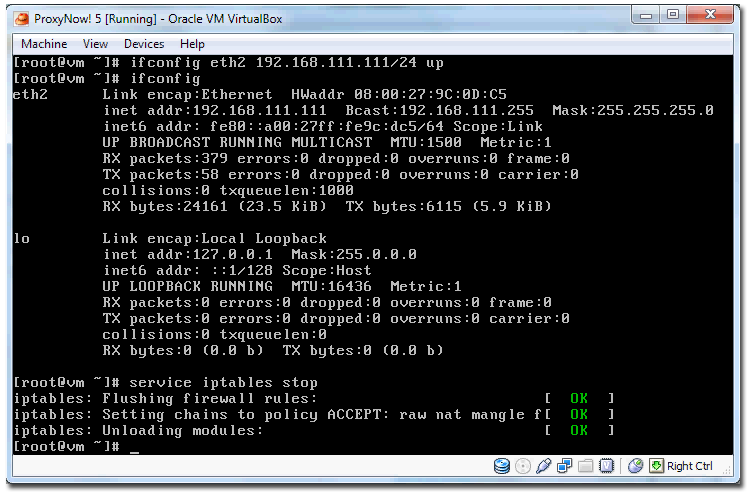
For us to access the web admin, we need to ensure that the firewall is turned off for the first time.
Type in the command, service iptables stop. This will turn off the firewall (need to do this once)
001304.png
Network Configuration
We will actually be configuring our network between the virtual host and ProxyNow! in this way.
ProxyNow! 5 will be using the 192.168.111.111 by default (whether it is the appliance or virtual machine version of the ProxyNow!)
For the VM host machine (the machine where VIrtualBox is Installed), we want to make sure that the network card been configured to the IP 192.168.111.112 (something in the same range as ProxyNow!) and this will allow us to access this virtual image and run the web admin. We also need to ensure that the gateway on the virtual machine host is G/W 192.168.111.111
To do all this, go to your Internet Connection and choose the right adapter. Just now we are using this adapt Intel®WiFi Link 5100 AGN. Right click on it and go to Properties
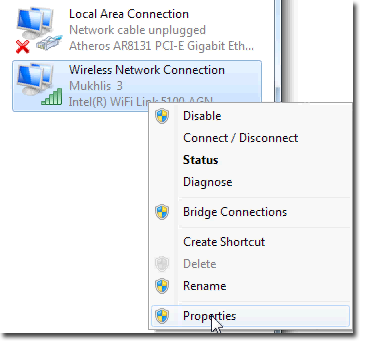
001447.png
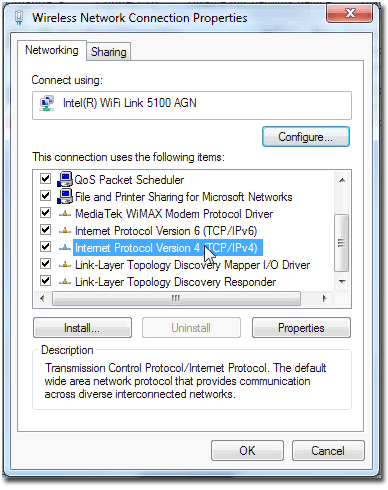
Click on Internet Protocol Version 4(TCP/IPv4) | Properties
001454.png
Change the setting to
IP address: 192.168.111.112
Subnet mask: 255.255.255.0
G/W: 192.169.111.111

001513.png
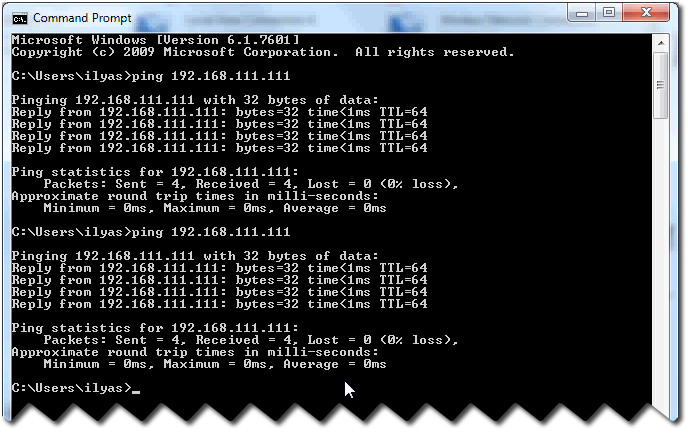
Once we have done this, we should be able to ping ProxyNow! from the host machine.
Test it by typing in the command prompt ping 192.168.111.111
001525.png
Next, key in https://192.168.111.111:31280 in your browser and you should be able to see the console.
You might get a warning from your browser saying that the HTTPS page is not valid/secured. Like the image below, you will see the cross in the browser, this is because of the fact that the certificate that is used for the web admin is a self generate certificate. So it is nothing to worry about and you can just proceed.

001547.png
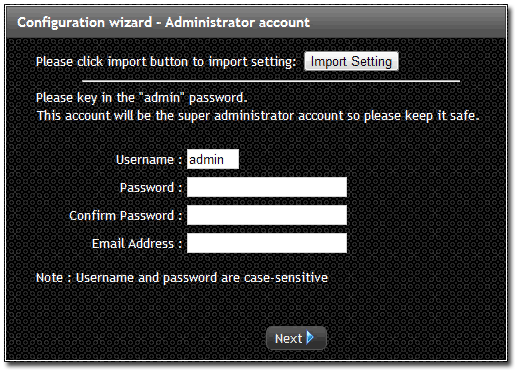
Lastly, if everything is working correctly, you should and be able to see this wizard.
001615.png
So these are all the basic steps to set up ProxyNow! as a virtual machine using VirtualBox. If you are using VMware or Virtual PC, you need to find out how to set up the virtual image using the respective software, but after that everything else is all just the same.
Copyright © 2012 www.ProxyNow.com.my